 Sight
Barrier is a product used to block the view of captive whitetail deer. Stress is
the number one enemy of whitetail deer breeders. Stress can be significantly
reduced by the use of Site Barrier.
Sight
Barrier is a product used to block the view of captive whitetail deer. Stress is
the number one enemy of whitetail deer breeders. Stress can be significantly
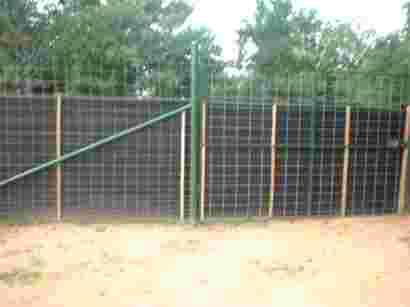
reduced by the use of Site Barrier.I hope some of these photos help. If you have additional questions, please stop by www.deer-crossing.com and go to Deer Talk. We are hosting a section on fencing. If you don't see your questions answered, please feel free to post your question so that all can benefit.
INSTALLATION TIPS
FOR
SIGHT BARRIER™
Sight
Barrier is a product used to block the view of captive whitetail deer. Stress is
the number one enemy of whitetail deer breeders. Stress can be significantly
reduced by the use of Site Barrier.
Installation is critical. Incorrect installation can greatly reduce the useable lifespan of the product and in some cases can result in the death of deer.
Sight Barrier is a woven plastic material that is treated for UV exposure.
The first point to remember is that
the material needs to be stretched tight. Not stretching the material tight will
result in wind damage to the material. Damage occurs when the material flaps
independently of the fence netting and and the plastic abrades. Once this
happens the material begins to fray. The material can be eaten by curious
animals. This can result in gastric distress even to the point of death.
To prevent this, the following method of
installation is recommended.
Make yourself some six foot long pieces of 1 x 2. Furring strips are available at lumber yards in 1 x 2 but are NOT recommended. This is just cheap wood and breaks very easily.
The best thing to do is get some treated lumber, 2 x 10 works great. Rip it into 3/4' strips and cut them into 6' pieces. You will probably be using a cordless drill. The treated wood is very dense, so we normally drill holes spaced about 12" apart. These holes will be used to start your screws.
Using 2" screws, you are going to use these wood strips to sandwich the plastic and your netwire together.
It's a two person job. Starting at the end of the fence run, wrap the plastic material around one of the wood strips (undrilled) at least two times. Place the wood strip with the plastic vertically against the fence at your starting point. Start your screws in the drilled wood strip and screw it to the strip with the plastic around it. You will have sandwiched the plastic and wire between the two strips of wood.
We usually space the material and the strips about six inches above the ground.
Tighten all the screws. Now, unroll the material about eight feet or so. Holding it tightly against the fence, attach two more wood strips, one to each side, of course. Continue this until you get to the end of your run. You can usually go around corners with no difficulties. Come at your gates from the hinged sides so that you can cover the spacing between the gate and the fence.
Do not space your wood strips more than six feet apart. At our ranch in west Texas, we routinely have serious winds. We have been using this material for over a year and have had no fraying whatsoever. I have seen other installations where the spacing of the wood was greater than six feet. The result is that the wind causes the plastic to flap against the fence material and eventually it starts to abrade. The result is little tiny strips of plastic that "run" like the bottom of a pair of cut-off jeans.
Animals in small pens can get bored. If the plastic material is allowed to unravel, the deer can eat it. This is not good. If your material gets frayed, trim it immediately. If you catch a deer trying to nibble on the material you must take action. If you don't, other deer will start doing it too. (ever hear of horses cribbing?) The best way I have found to stop deer from having any interest in the material is to spray the area with "pepper spray". This is the same pepper spray that is used for self defense. Be sure to be upwind when you do! Hold the spray close to the cloth and "paint" the area with the spray. It is red so you will easily see it. This will definitely get the deer to stop nibbling the area.
Don't fight wind when installing this
material. Wait for a calm day or if the wind is in your favor you can use it to
hold the plastic up against the fencewire!

When doing very short runs like between a post and a barn, we usually use plywood. We paint it flat black and then use the 1 x 2's to hold it up and it will match the rest of your installation.